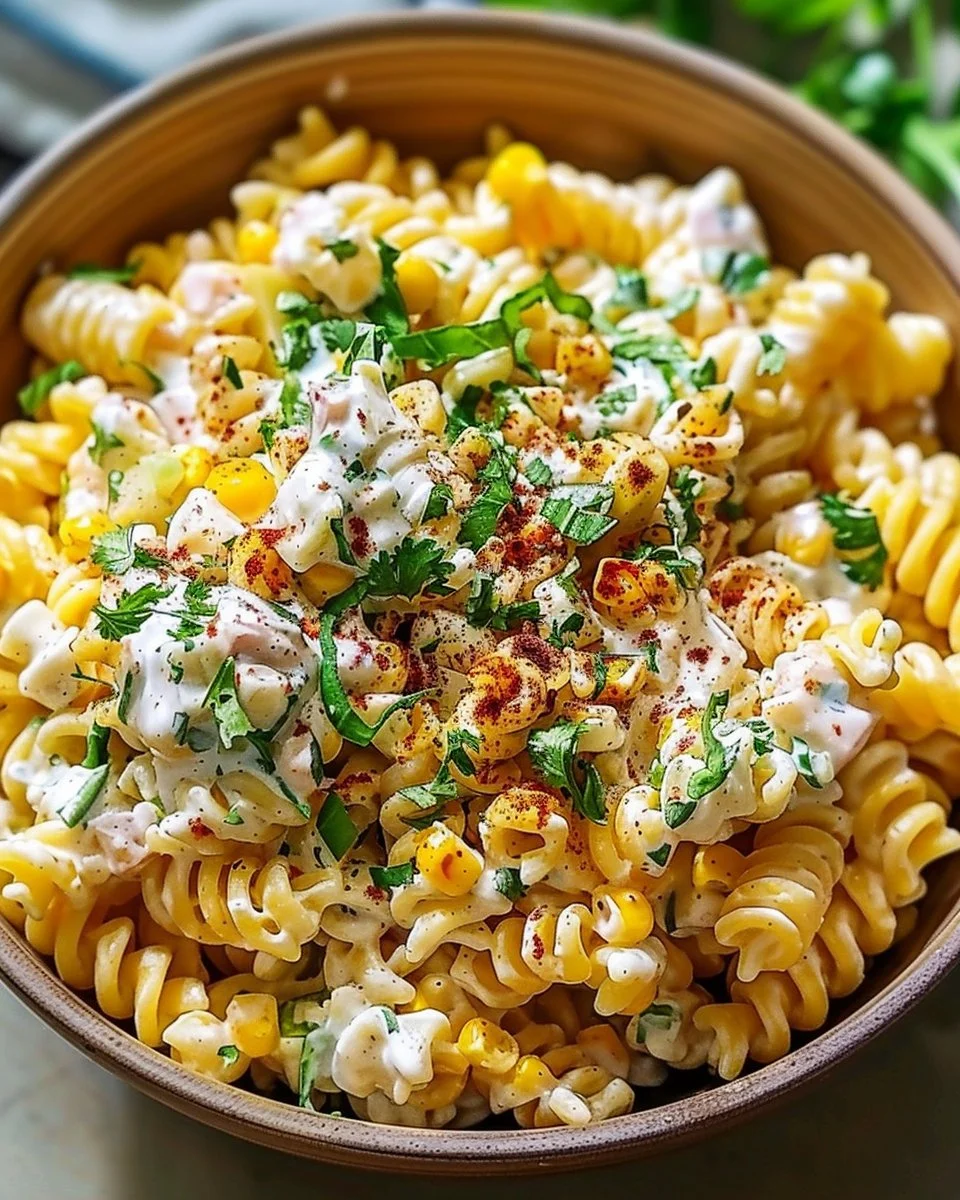
Elote Pasta Salad with Greek Yogurt

Discover the Delight: Tasty Elote Pasta Salad with Greek Yogurt
You know that magical moment when you take a bite of something that just transports you to summer barbecues and sun-soaked picnics? That’s exactly what you get with Tasty Elote Pasta Salad featuring creamy Greek yogurt! This vibrant dish doesn’t just burst with flavor; it captures the essence of elote, a beloved Mexican street food, blending it seamlessly into a hearty pasta salad. Picture tender rotini coated in a zesty, creamy dressing, vibrant corn, and delightful bits of chicken. If you’re looking for a refreshing, satisfying dish that will steal the show at your next gathering, you’ve come to the right place!
The Allure of Elote Pasta Salad
Why does this dish resonate with so many? A traditional elote is celebrated for its unique combination of sweet corn, tangy cheese, and savory spices. By incorporating these elements into pasta salad, you create a fusion that’s both comforting and exciting. Plus, swapping heavy mayonnaise for Greek yogurt not only lightens the recipe but enhances the texture, making each bite smooth and creamy while packing in the protein.
Why You’ll Love This Recipe
- Flavor Explosion: The combination of lime, chili, and cotija cheese isn’t just delicious—it’s vibrant and fun!
- Healthy Twist: Using Greek yogurt not only adds creaminess but also increases the nutritional value with probiotics and less fat.
- Versatile Options: You can serve it as a side dish or make it the main attraction on a hot summer day.
- Easy to Customize: Swap out ingredients based on your preferences to create your ideal pasta salad.
Ingredients You’ll Need
Ready to get cooking? Here’s what you’ll need for this incredible Tasty Elote Pasta Salad:

- 1 cup Greek yogurt (I prefer Fage total 5% for the creamiest texture)
- 3 tbsp mayo
- 1.5 tsp chili powder
- 1/2 tsp garlic powder
- 1/4 tsp salt
- 1.5 limes (zested and juiced for maximum citrus punch)
- 6.7 oz rotini (I always use Barilla for a perfect al dente bite)
- 2.5 cups corn
- 2 tsp avocado oil
- 1/4 tsp chili powder
- 2.5 cups chicken (shredded into bite-sized 1-inch pieces)
- 1 cup cotija (crumbled into small chunks to distribute flavor)
- 1/2 cup cilantro
- Lime wedges for serving
Step-by-Step Guide to Elote Pasta Bliss
Creating this pasta salad is an absolute breeze! Follow these steps, and you’ll have a stunning dish ready in no time.
-
Cook Pasta: Start by boiling the rotini in salted water according to package directions until al dente. Drain it and set aside to cool.
-
Prepare the Dressing: In a large mixing bowl, whisk together Greek yogurt, mayonnaise, chili powder, garlic powder, salt, lime zest, and lime juice until smooth and creamy.
-
Combine Main Ingredients: Add the cooled rotini, corn, avocado oil, chicken, cotija, and cilantro into the bowl with the dressing. Stir gently to ensure everything is well combined.
-
Taste and Adjust: Give it a taste and adjust seasonings as needed—perhaps a little more lime or chili?
-
Chill: For the best flavor, cover the salad and let it chill in the refrigerator for at least 30 minutes to allow the flavors to meld.
-
Serve: Garnish with additional cotija, fresh cilantro, and lime wedges for that extra burst of color and flavor.
Expert Tips for the Perfect Pasta Salad
- Don’t Overcook the Pasta: Remember, al dente pasta holds its shape better and absorbs flavors nicely without becoming mushy.
- Fresh Ingredients Matter: Whenever possible, use freshly squeezed lime juice and fresh corn for added sweetness and flavor.
- Mix and Match: Want to add some jalapeños for heat? Or maybe black beans for extra protein? Don’t hesitate to get creative!
Common Pitfalls to Avoid
Even seasoned cooks can make a few missteps. Here are some common mistakes to sidestep:
- Using Low-Quality Yogurt: For the best creaminess and flavor, opt for a high-quality Greek yogurt. The texture and taste will significantly impact your salad.
- Skipping the Chill Time: Allowing the salad to chill is crucial for letting the flavors blend beautifully. Don’t rush this step!
- Ignoring Texture: Mix gently to keep your ingredients intact and maintain a pleasant texture throughout.
Serving Suggestions
This Tasty Elote Pasta Salad with Greek Yogurt is a versatile dish that pairs well with so many foods. Here are a few serving ideas:
- As a Standalone Meal: Perfect for lunch on its own, making it easy to take to work or school.
- At Your Next BBQ: Serve it alongside grilled meats or veggie skewers to balance the rich flavors of the barbecue.
- Picnic Perfect: This salad travels well. Just pack it in a cooler and enjoy it outdoors!
Storage Tips
Have leftovers? No problem! This pasta salad keeps well in the refrigerator for up to 3 days. Just be sure to store it in an airtight container. If you find the dressing becoming a bit thick, add a splash of lime juice or yogurt before serving to restore its creamy consistency.
Frequently Asked Questions
How do I make Elote Pasta Salad with Greek Yogurt more spicy?
You can add finely chopped jalapeños or extra chili powder to give your salad that spicy kick! Alternatively, drizzle some hot sauce over the top before serving.
Can I prepare this salad in advance?
Yes! Preparing Tasty Elote Pasta Salad with Greek Yogurt a day ahead of time can enhance the flavors. Just remember to give it a good stir before serving.
What can I substitute for chicken?
Feel free to swap in black beans or grilled shrimp if you want to keep it meatless or if you just prefer a different protein.
In Closing
This Tasty Elote Pasta Salad with Greek Yogurt is more than just a dish; it’s a joyful celebration of flavors that everyone will love. With its bright ingredients and healthy twist, it’s perfect for any occasion—whether a busy weeknight dinner or a festive gathering. Now that you have this recipe, you’re well on your way to serving up smiles all around. Happy cooking!