
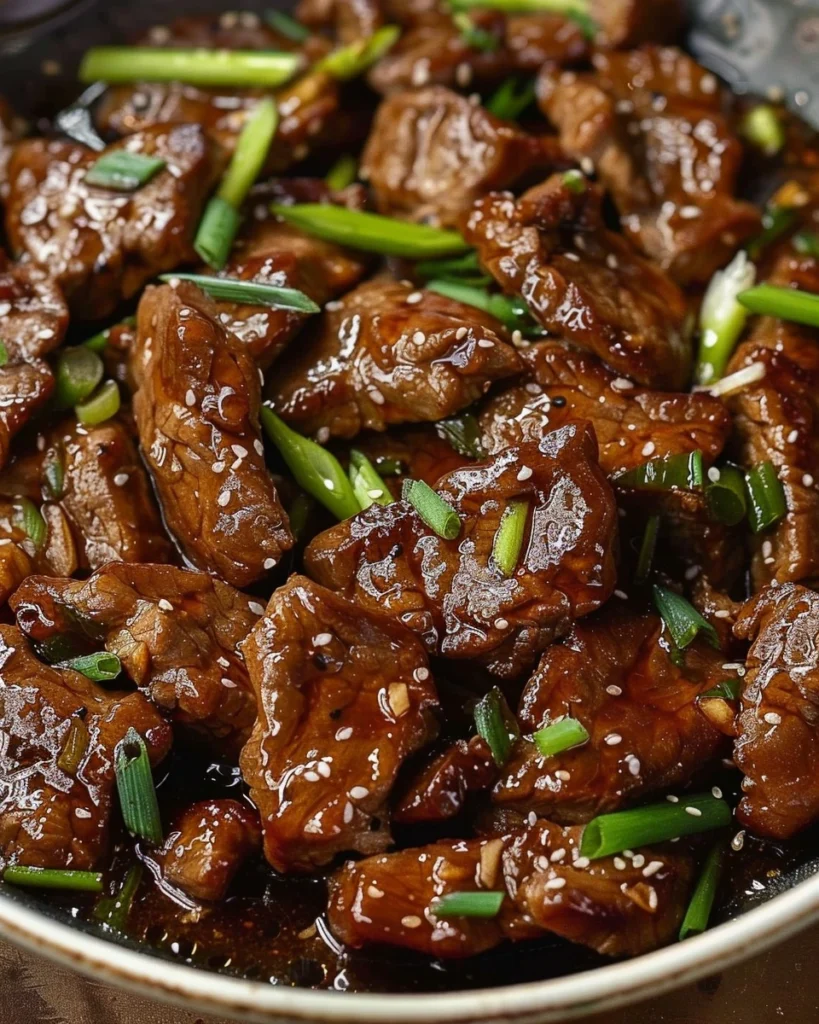
Easy Mongolian Beef

If you love bold takeout flavors but want a faster, lighter homemade version, this easy Mongolian beef is exactly what you need. Takeout can be expensive, overly sweet, and greasy—and sometimes you just want that savory-sweet comfort without waiting or guessing what’s in it.
This recipe delivers tender beef coated in a glossy Mongolian-style sauce with garlic, ginger, and just the right balance of sweet and salty. I’ve made this countless times on busy weeknights when cravings hit, and it never takes more than 30 minutes from start to finish.
In this post, you’ll learn how to keep the beef tender, how to thicken the sauce perfectly, easy substitutions, and make-ahead tips so your easy Mongolian beef turns out better than takeout every time.
Why You’ll Love This Recipe
-
Better than takeout flavor at home
-
Ready in about 30 minutes
-
Simple ingredients you likely already have
-
Perfect for weeknights and meal prep
Ingredients & Prep
This is a quick-cooking beef recipe, so slicing and prep are key.
Main Ingredients Prep
-
Flank steak or sirloin – Slice thinly against the grain
-
Green onions – Cut into 2-inch pieces
-
Fresh garlic and ginger – Minced for bold flavor
Seasonings, Sauces, or Flavor Base
-
Soy sauce – Low-sodium works best
-
Brown sugar – Classic Mongolian sweetness
-
Cornstarch – For coating beef and thickening sauce
-
Water or beef broth – Creates the sauce base
Pantry Staples
-
Neutral oil (vegetable or avocado oil)
-
Black pepper
-
Optional red pepper flakes
Step-by-Step Cooking Instructions
Pre-Cooking Prep
-
Slice beef thinly against the grain.
-
Toss beef with cornstarch until lightly coated.
-
Mix soy sauce, brown sugar, water (or broth), and ginger in a bowl.
Cooking Method
-
Heat oil in a large skillet over medium-high heat.
-
Add beef in a single layer and cook for 2–3 minutes per side until browned. Work in batches if needed.
-
Remove beef and set aside.
-
Lower heat slightly and add garlic to the skillet. Cook for 30 seconds until fragrant.
-
Pour in the sauce mixture and bring to a gentle simmer.
-
Let sauce thicken for 2–3 minutes.
-
Return beef to the skillet and toss to coat.
-
Stir in green onions and cook for 1–2 minutes.
Doneness or Texture Check
The beef should be tender, not chewy, and the sauce should cling nicely to each slice.
Resting or Final Touches
Remove from heat and let sit for 2 minutes to allow the sauce to finish thickening.

Pro Tips for Perfect Results
Common Mistakes to Avoid
-
Cutting beef with the grain – This makes it tough
-
Overcooking the beef – Thin slices cook very fast
-
Too much sugar – Mongolian beef should be balanced, not candy-sweet
Recommended Tools
-
Sharp chef’s knife
-
Large skillet or wok
-
Mixing bowl
Storage & Reheating Tips
-
Store leftovers in the fridge up to 3 days
-
Reheat gently in a skillet with a splash of water
-
Avoid microwaving on high heat
Flavor Variations
Spicy Version
-
Add red pepper flakes or chili garlic sauce
-
Stir in sriracha for heat
Healthy / Special Diet Option
-
Use low-sodium soy sauce
-
Reduce sugar or swap for honey or coconut sugar
-
Serve over cauliflower rice
Global Flavor Twist
-
Add hoisin sauce for deeper flavor
-
Stir in sesame oil at the end for aroma
Serving Suggestions
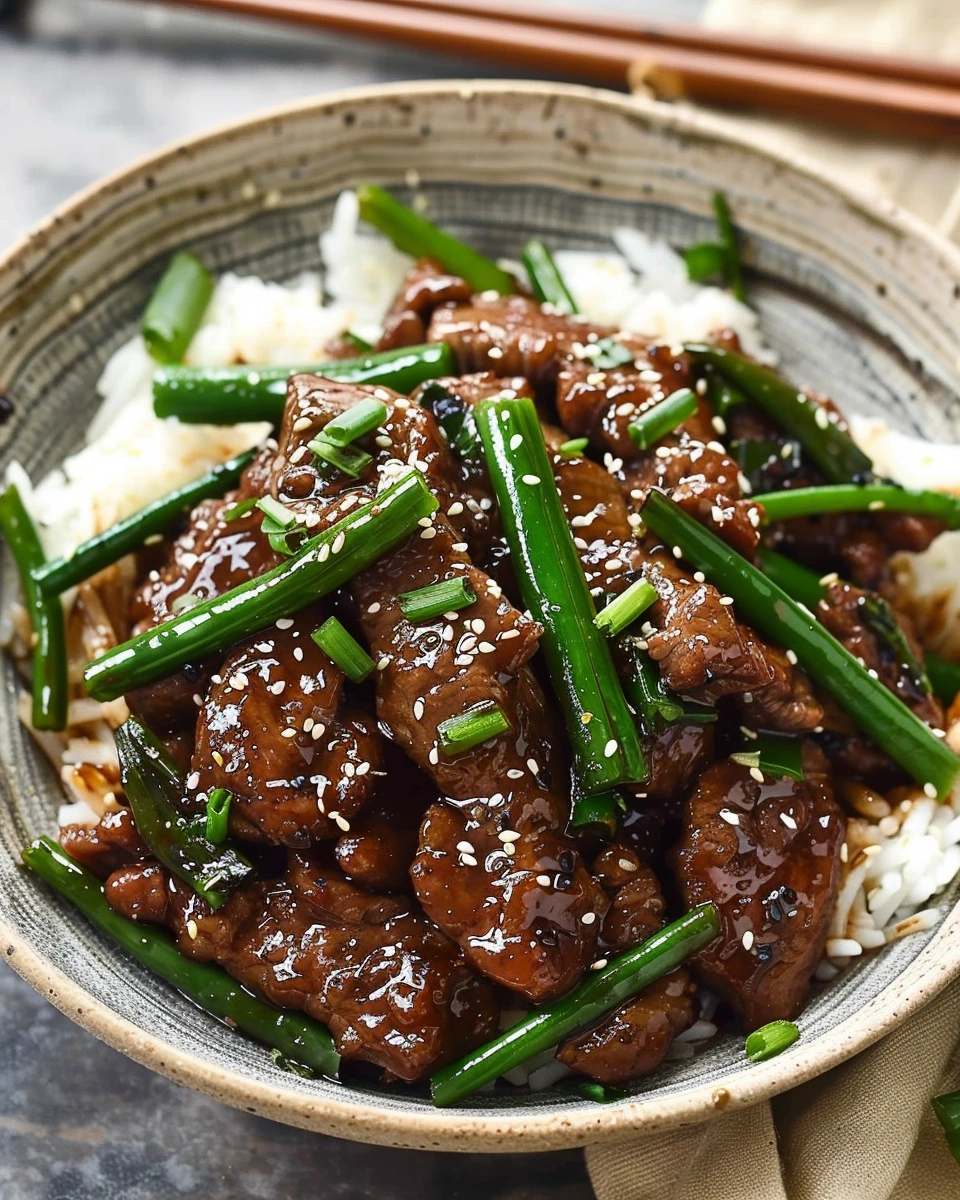
Easy Mongolian beef pairs perfectly with:
-
Steamed white or brown rice
-
Fried rice or lo mein
-
Steamed broccoli or snap peas
-
Sesame seeds on top for garnish
FAQs
Can I make this ahead of time?
Yes. Slice beef and mix sauce ahead of time. Cook fresh for best texture.
How do I fix common mistakes?
If sauce is too thick, add water. If beef is chewy, slice thinner next time and reduce cooking time.
Conclusion
This easy Mongolian beef proves you don’t need takeout to enjoy big, bold flavors at home. It’s quick, satisfying, and made with simple ingredients—perfect for busy nights and repeat cravings.
Once you try it, it’ll earn a permanent spot in your weeknight rotation. Save it, customize it, and enjoy a homemade favorite that’s faster and better than delivery.
Easy Mongolian Beef
SarahIngredients
- Main Ingredients
- 1 lb flank steak or sirloin thinly sliced against the grain
- 4 green onions cut into 2-inch pieces
- Sauce & Flavor Base
- ½ cup low-sodium soy sauce
- ⅓ cup brown sugar
- ¾ cup water or beef broth
- 1 tbsp fresh ginger minced
- 3 cloves garlic minced
- Thickening & Cooking
- ¼ cup cornstarch for coating beef
- 2 tbsp neutral oil vegetable or avocado oil
- Optional
- Red pepper flakes to taste
- Freshly cracked black pepper
Instructions
- Prep the Beef
- Slice beef thinly against the grain.
- Toss beef with cornstarch until lightly coated.
- Make the Sauce
- In a bowl, whisk together soy sauce, brown sugar, water (or broth), and ginger. Set aside.
- Cook the Beef
- Heat oil in a large skillet or wok over medium-high heat.
- Add beef in a single layer and cook 2–3 minutes per side until browned.
- Work in batches if needed. Remove beef and set aside.
- Build the Sauce
- Reduce heat slightly.
- Add garlic to the skillet and cook 30 seconds until fragrant.
- Pour in the sauce mixture and bring to a gentle simmer.
- Thicken & Finish
- Simmer sauce 2–3 minutes until thickened.
- Return beef to the skillet and toss to coat.
- Stir in green onions and cook 1–2 minutes.
- Serve
- Remove from heat and rest 2 minutes before serving.
Notes
- Thin slicing is key for tender beef.
- Keep heat high when cooking beef, but don’t overcook.
- Sauce thickens more as it cools.