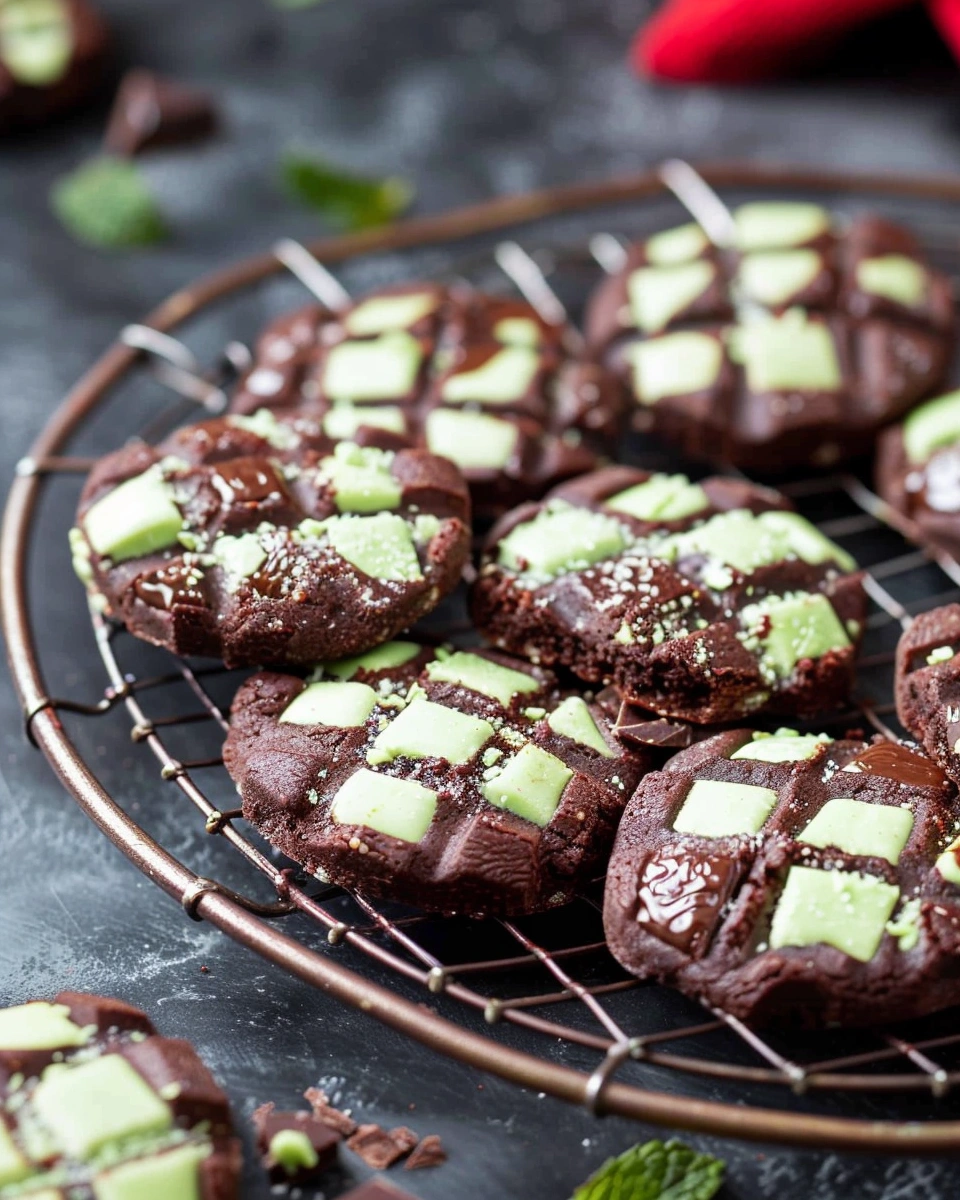
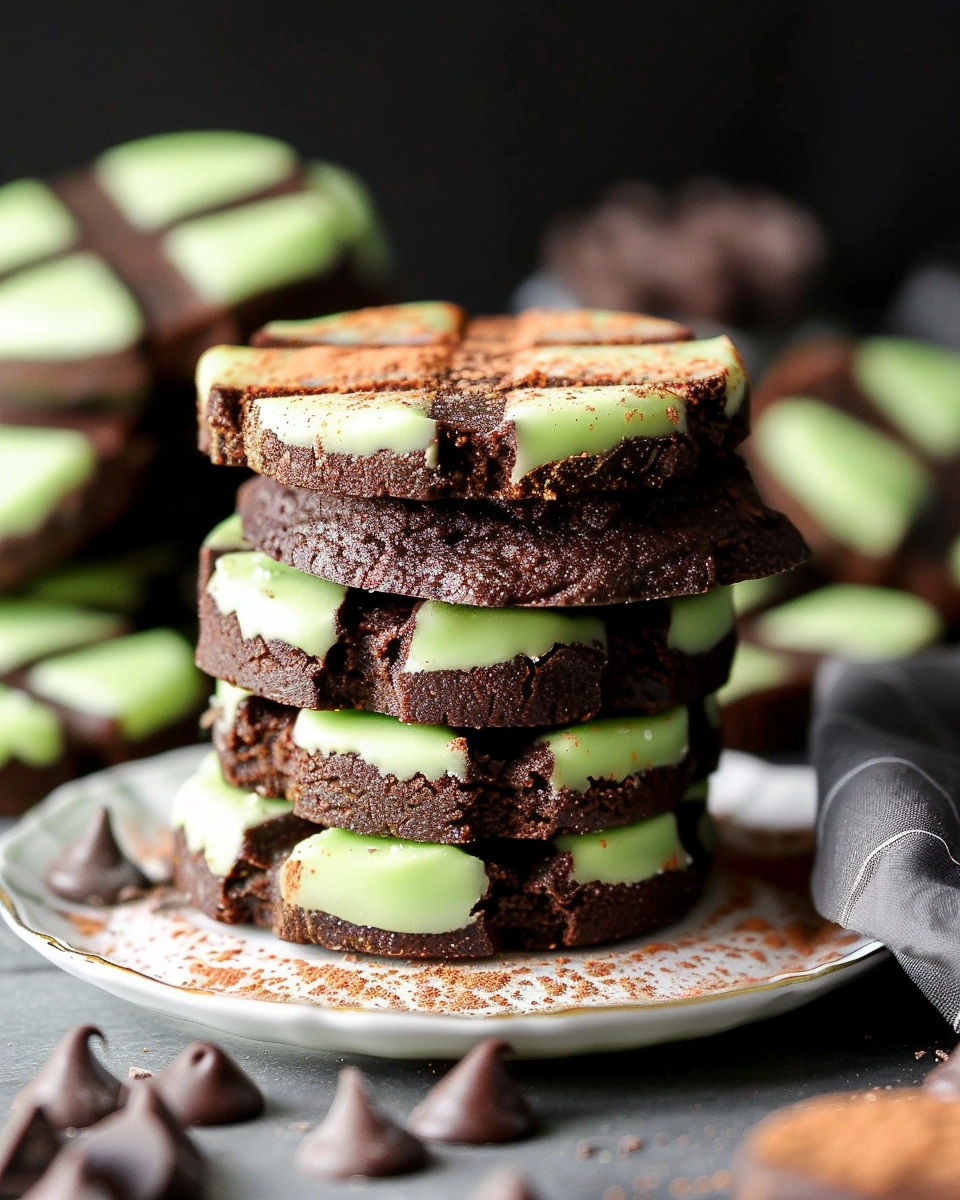
Mint Chocolate Checkerboard Cookies
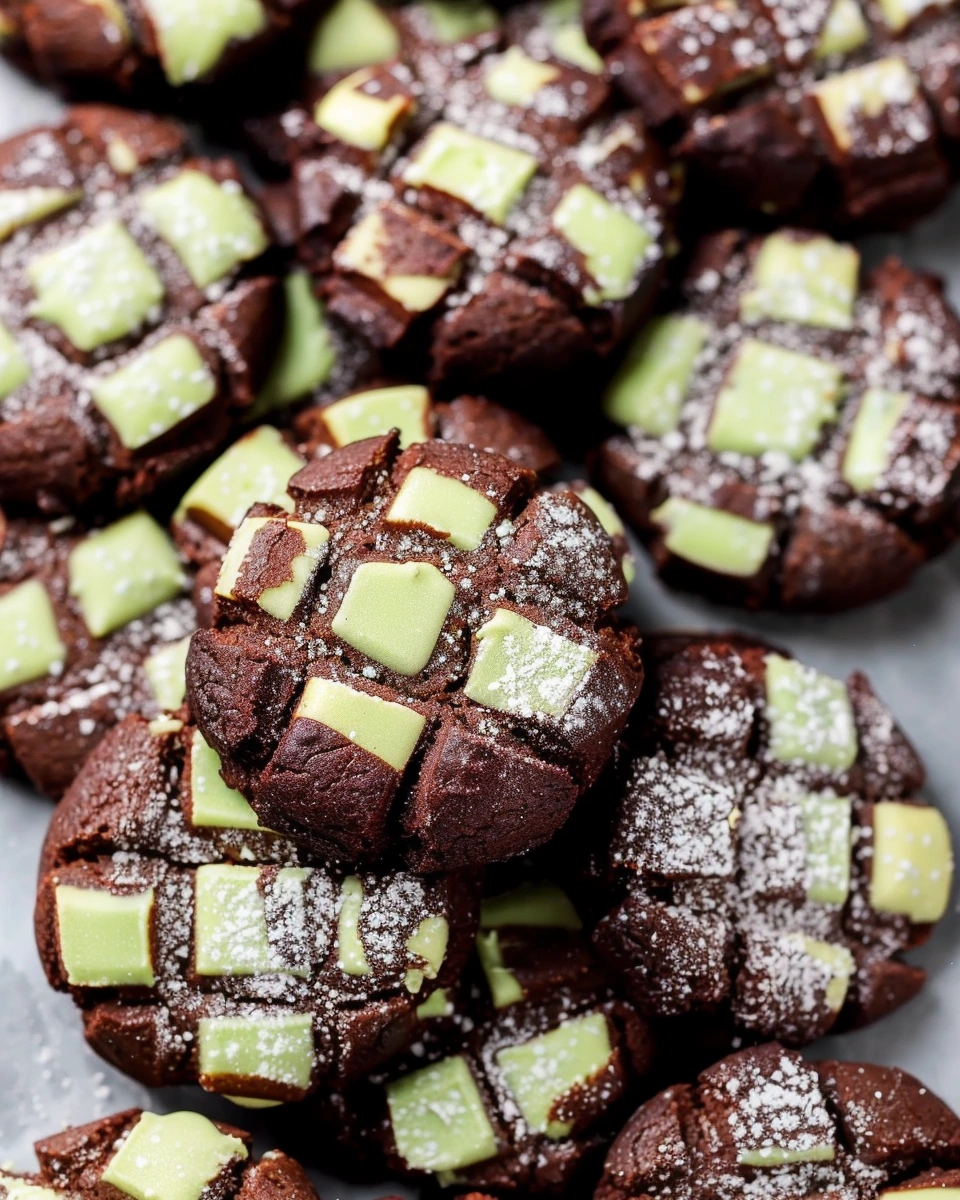
If you’ve ever wanted to make bakery-style cookies that look impressive but worried they’d be too complicated, these Mint Chocolate Checkerboard Cookies are the perfect solution. They may look fancy, but they’re made with simple doughs and a clear step-by-step method that anyone can follow.
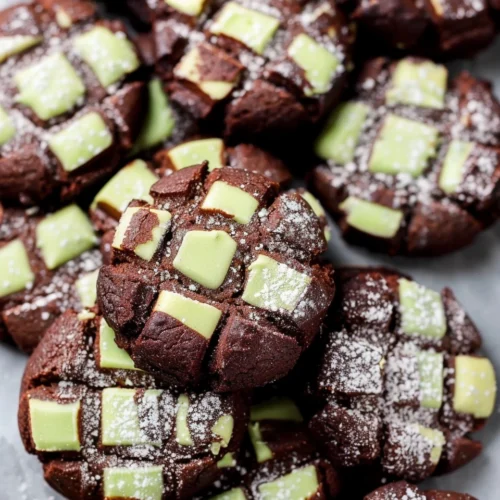
I’ve baked these cookies for holidays, cookie exchanges, and special occasions, and they always steal the show. The combination of rich chocolate cookie dough and cool mint dough creates a beautiful checkerboard pattern and a flavor that feels festive without being overwhelming. In this recipe, you’ll learn how to shape the dough easily, keep the pattern crisp, and get clean slices every time.
Why You’ll Love This Recipe
-
Stunning presentation: Eye-catching checkerboard pattern
-
Classic flavor combo: Rich chocolate paired with cool mint
-
Make-ahead friendly: Perfect for holidays and events
Ingredients & Prep
Main Ingredients Prep
-
Unsalted butter: Softened to room temperature
-
Granulated sugar: Sweetens and keeps cookies tender
-
Egg: Room temperature for smooth dough
-
All-purpose flour: Forms the base of both doughs
Divide the dough evenly so the checkerboard pattern stays balanced.
Seasonings, Sauces, or Flavor Base
-
Cocoa powder: Gives deep chocolate flavor
-
Peppermint extract: Adds cool mint taste
-
Vanilla extract: Rounds out both doughs
-
Green food coloring (optional): For a classic mint look
Pantry Staples
-
Baking powder
-
Salt
-
Parchment paper
-
Plastic wrap
Step-by-Step Cooking Instructions
Pre-Cooking Prep
-
Preheat oven to 350°F.
-
Line baking sheets with parchment paper.
-
Measure all ingredients before starting.
Cooking Method (Times & Temps)
-
Cream butter and sugar together until light and fluffy, about 2–3 minutes.
-
Beat in egg and vanilla extract until smooth.
-
Mix flour, baking powder, and salt in a separate bowl.
-
Add dry ingredients to wet ingredients and mix just until combined.
-
Divide dough evenly into two bowls.
-
In one bowl, mix in cocoa powder.
-
In the other bowl, mix in peppermint extract and food coloring if using.
-
Shape each dough into rectangular logs, wrap, and chill for 30–45 minutes.
-
Slice logs lengthwise into equal strips.
-
Alternate chocolate and mint strips to form a checkerboard pattern.
-
Gently press together, reshape into a log, and chill again for 15 minutes.
-
Slice into ¼-inch cookies and place on baking sheets.
-
Bake for 10–12 minutes, until edges are set.
Doneness or Texture Check
-
Cookies should hold sharp edges
-
Bottoms should be lightly golden
-
Centers should look set but not browned
Resting or Final Touches
Cool cookies on the baking sheet for 5 minutes, then transfer to a wire rack to cool completely.
Pro Tips for Perfect Results
Common Mistakes to Avoid
-
Uneven dough strips: Measure carefully for clean patterns
-
Skipping chill time: Dough must be firm for slicing
-
Overbaking: Keeps cookies from drying out
Recommended Tools
-
Electric mixer
-
Bench scraper or sharp knife
-
Ruler (helpful for even strips)
-
Parchment paper
Storage & Reheating Tips
-
Store in an airtight container for up to 5 days
-
Freeze baked cookies for up to 2 months
-
Dough logs can be frozen and sliced later
Flavor Variations
Spicy Version
-
Add a pinch of cayenne to the chocolate dough
-
Sprinkle with flaky sea salt before baking
Healthy / Special Diet Option
-
Gluten-free: Use a 1:1 gluten-free flour blend
-
No food coloring: Leave mint dough natural
-
Lower sugar: Slightly reduce sugar in both doughs
Global Flavor Twist
-
Holiday style: Dip half the cookie in melted dark chocolate
-
Andes-inspired: Add chopped mint chocolate pieces
-
Vanilla-mint: Skip cocoa and use vanilla + mint contrast
Serving Suggestions
Mint chocolate checkerboard cookies are perfect for:
-
Holiday cookie trays
-
Cookie exchanges
-
Gifting in decorative tins
Serve with:
-
Hot cocoa
-
Coffee or espresso
-
Cold milk
They’re especially great for:
-
Christmas
-
St. Patrick’s Day
-
Winter parties
FAQs
Can I make the dough ahead of time?
Yes. Wrapped dough logs can be refrigerated for up to 3 days or frozen for later use.
How do I fix common mistakes?
If the pattern looks uneven, gently reshape the log before slicing. If cookies spread, chill the dough longer.
Conclusion
These Mint Chocolate Checkerboard Cookies are as fun to make as they are to eat. With their bold pattern, crisp edges, and classic mint-chocolate flavor, they’re guaranteed to impress without requiring advanced baking skills.
Bakers love how reliable and festive this recipe is for special occasions. If you enjoyed these cookies, try pairing them with Vanilla Bean Spring Cookies or Mint Chocolate Chip Cheesecake Brownies for a stunning dessert spread. Happy baking!
Mint Chocolate Checkerboard Cookies
Ingredients
- Base Dough
- 1 cup unsalted butter softened
- ¾ cup granulated sugar
- 1 large egg room temperature
- 1 teaspoon vanilla extract
- 2¼ cups all-purpose flour
- ½ teaspoon baking powder
- ¼ teaspoon salt
- Chocolate Dough
- 3 tablespoons unsweetened cocoa powder
- Mint Dough
- ½ teaspoon peppermint extract adjust to taste
- Green food coloring optional
Instructions
- Preheat oven to 350°F (175°C). Line baking sheets with parchment paper.
- In a large bowl, cream butter and sugar for 2–3 minutes until light and fluffy.
- Beat in egg and vanilla until smooth.
- In a separate bowl, whisk flour, baking powder, and salt.
- Add dry ingredients to wet ingredients and mix just until combined.
- Divide dough evenly into two bowls.
- Mix cocoa powder into one bowl (chocolate dough).
- Mix peppermint extract and food coloring (if using) into the other bowl (mint dough).
- Shape each dough into a rectangular log, wrap in plastic wrap, and chill 30–45 minutes.
- Slice each log lengthwise into equal strips.
- Alternate chocolate and mint strips to form a checkerboard pattern.
- Gently press together, reshape into a log, and chill 15 minutes.
- Slice into ¼-inch cookies and place on baking sheets.
- Bake for 10–12 minutes, until edges are set.
- Cool on the pan for 5 minutes, then transfer to a wire rack.
Notes
- Chilling is essential for clean slicing and sharp patterns.
- Measure strips carefully for an even checkerboard look.
- Cookies should stay pale—do not overbake.