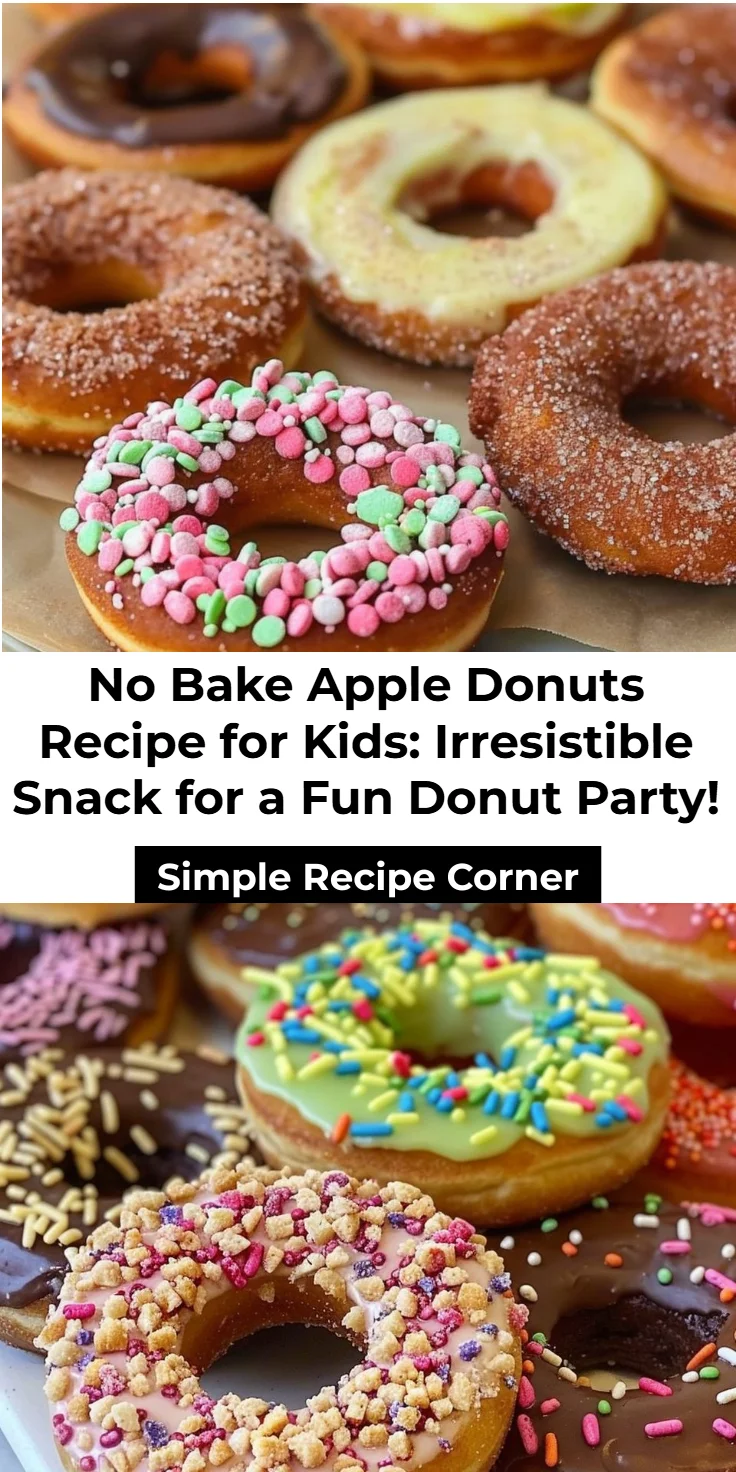
No-Bake Apple Donuts Recipe for Kids

No Bake Apple Donuts Recipe for Kids: The Ultimate Donut Party Snack Inspiration
There’s something magical about cooking with kids, isn’t there? Watching their eyes light up as they create something delicious is priceless. If you’re looking for a fun, no-fuss recipe that will engage little hands and tickle tiny taste buds, the No Bake Apple Donuts Recipe for Kids is just the ticket! Not only are these apple donuts a delightful, healthy alternative to traditional fried treats, but they also make for an exciting preschool cooking activity. So roll up your sleeves and let’s dive into the world of fruity donut joy!
Why No Bake?
The appeal of no-bake recipes is undeniable, especially when it comes to cooking with children. No baking means no waiting, which is a huge win when you’re wrangling little ones. Instead of enduring the anxious anticipation of the oven timer, you can get straight into the fun of decorating and enjoying your treats. Plus, these apple donuts are not just easy; they’re also a fantastic way to sneak in some vitamins and fiber!
Health Benefits of Apple Donuts
Before we get into the nitty-gritty of the recipe, let’s talk about why these no-bake apple donuts are not just fun, but nutritious too. Apples are packed with essential vitamins, antioxidants, and fiber, making them a powerhouse of goodness for your little ones. Here are a few key benefits:
- Fiber: Supports digestive health.
- Vitamin C: Boosts the immune system.
- Hydration: Apples have a high water content, helping keep kids hydrated.
- Low in Calories: A guilt-free snack option that kids will love!
Gather Your Ingredients
To whip up these delightful No Bake Apple Donuts, you’ll need just a few simple ingredients that will likely be a hit with the kids:
- 2 medium-sized apples (any sweet variety will do)
- 1 cup of nut butter (like almond or peanut butter for a nutty flavor)
- 1 cup of granola or crushed cereal (for crunch!)
- Assorted toppings (chocolate chips, mini marshmallows, sprinkles, or shredded coconut)
- Optional: honey or maple syrup for drizzling
Step into the Kitchen: A Simple, Fun Recipe
Ready? Let’s get cooking! Here’s how you can make these no-bake apple donuts in just a few easy steps that kids will love helping with.
Step 1: Core and Slice the Apples
- Start by carefully coring the apples. You may want to do this part for safety, using an apple corer or knife.
- Slice the apples into thick rings, about 1/2 inch thick. You should have enough rings to make several donuts.
Step 2: Spread on the Nut Butter
- Grab the nut butter and let your kiddos spread it onto one side of each apple ring using a butter knife or a spoon. This will serve as the “frosting” for your apple donuts!
Step 3: Add Crunchy Granola
- Sprinkle granola or your crushed cereal on top of the nut butter-melted apple. Encourage your little chefs to get creative!
Step 4: Decorate!
- Let the kids decorate their apple donuts with assorted toppings. Chocolate chips, mini marshmallows, or colorful sprinkles will surely make the experience fun and delectable.
Step 5: Drizzle (Optional)
- For that extra touch of sweetness, drizzle honey or maple syrup over the top. Just a little will go a long way!
Step 6: Serve and Enjoy
- Once everyone is done making their donuts, gather around and dig in! It’s a great opportunity to talk about the colors and textures of the ingredients used.

Pro Tips for a Fun Cooking Experience
- Make it a Theme: Set the mood with themed decorations that let kids explore the essence of a donut party.
- Experiment: Don’t hesitate to try different toppings. Use whatever fruits and nuts you have on hand.
- Safety First: Always supervise young children when using utensils, especially when they are being used for spreading or cutting.
- Involve Everyone: Give each child a specific role – one can slice, another can spread, and yet another can decorate. This promotes teamwork and keeps everyone engaged.
Variations to Keep it Fresh
Try changing up the recipes by:
- Using Different Fruits: Pears, bananas, or even peaches can be delightful substitutes for apples.
- Adding Yogurt: Swap out nut butter for yogurt for a creamy, tangy twist.
- Going Vegan: Use almond or cashew butter for a plant-based version.
- Infusing Spices: A dash of cinnamon or nutmeg can add an exciting flavor dimension.
Common Mistakes to Avoid
Cooking with kids can get messy, and that’s part of the fun! However, keeping these tips in mind can help reduce mishaps:
- Overloading Toppings: Encourage moderation. Too many toppings can make the apple donuts top-heavy and hard to eat.
- Forgetting to Core the Apples: This step is crucial! Ensure all seeds and cores are out before children dive into decorating.
- Not Supervising: Even though it’s a no-bake recipe, always keep an eye on younger children to ensure safety.
FAQs About No Bake Apple Donuts
Q: How do you make No Bake Apple Donuts?
A: To make No Bake Apple Donuts, core and slice apples, spread nut butter on top, add granola, and decorate with various toppings. It’s a fun, quick process perfect for kids!
Q: What are some toppings I can use for apple donuts?
A: Great toppings include chocolate chips, mini marshmallows, granola, nuts, and even a drizzle of honey or yogurt.
Q: Can I use other fruits instead of apples?
A: Absolutely! Pears, bananas, and peaches work wonderfully in this recipe.
Q: Are No Bake Apple Donuts a healthy snack?
A: Yes! They’re made with fruit and nut butter, providing vitamins, minerals, and healthy fats.
Q: What age is appropriate for kids to help make this recipe?
A: Kids as young as preschool age can help with this recipe, under adult supervision for safety.
Q: How can I store leftover apple donuts?
A: Leftover apple donuts are best eaten fresh. However, you can store them in an airtight container in the refrigerator for short-term enjoyment.
The Sweet Conclusion
Creating No Bake Apple Donuts with your children not only makes for a delectable treat but also creates lasting memories in the kitchen. It’s a perfect example of how cooking can spark creativity and bring joy, all while sneaking in a nutritious boost. So gather your ingredients, get ready to decorate, and enjoy the smiles that this delightful activity will bring. Happy baking (or should we say, assembling)!