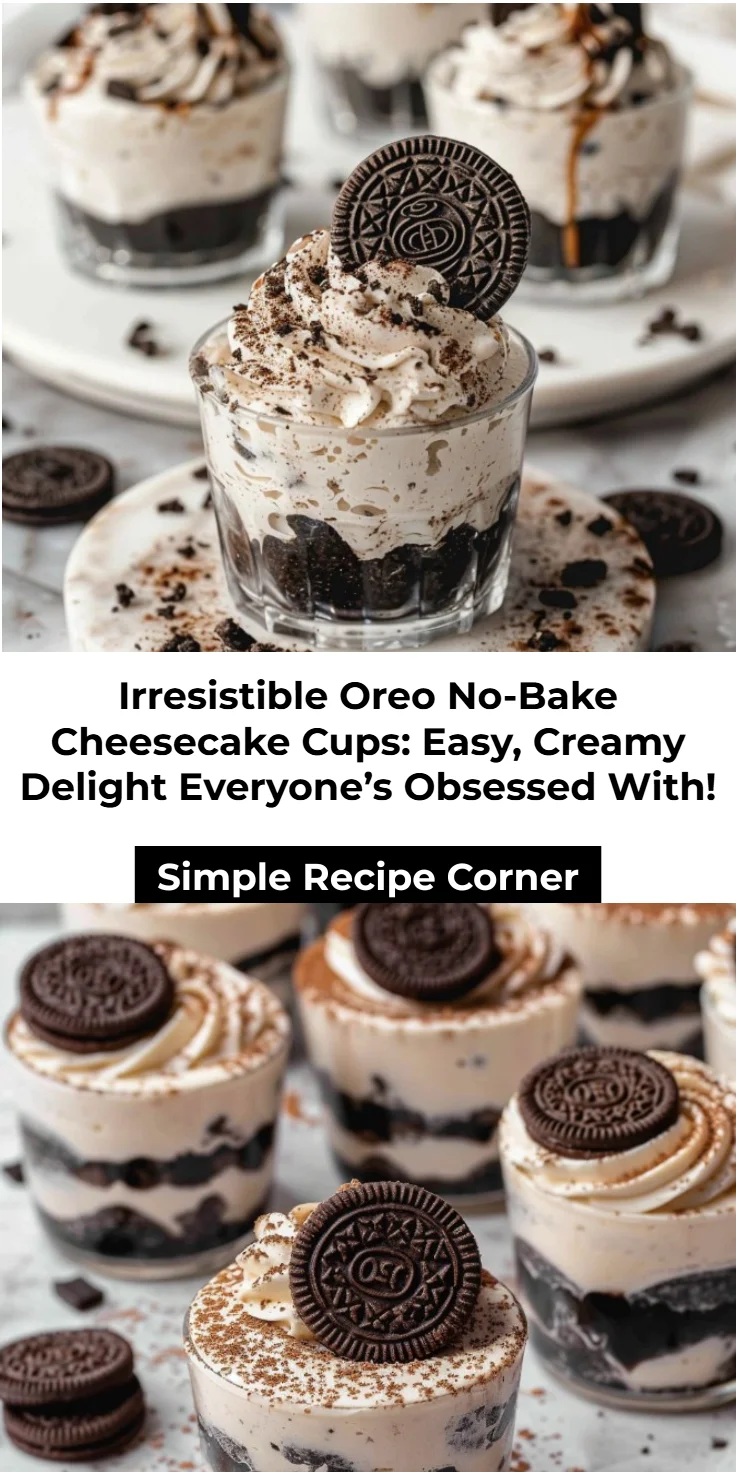
Oreo No-Bake Cheesecake Cups: Quick, Creamy Treats You’ll Love
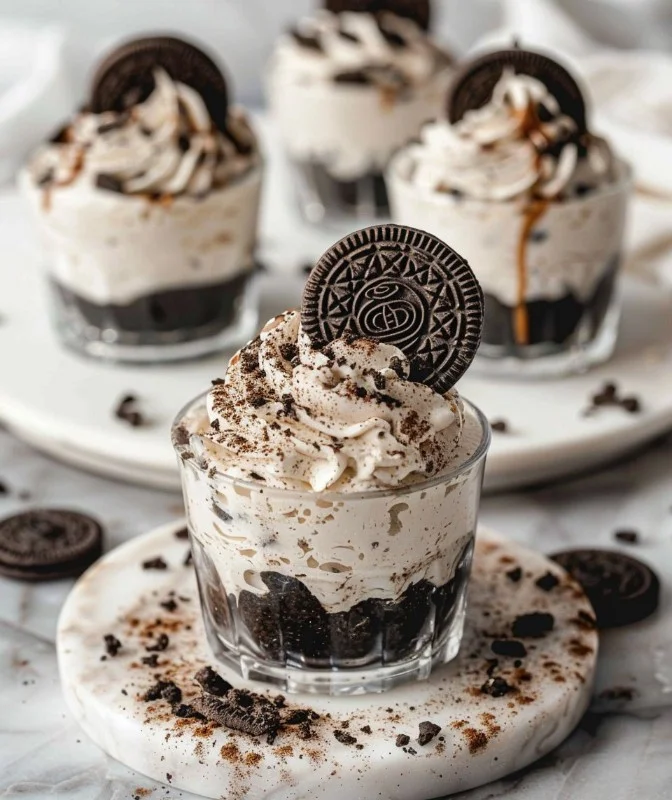
Craving something sweet that’s also incredibly easy to whip up? If you find yourself yearning for a dessert that’s both creamy and crunchy, look no further than Oreo No-Bake Cheesecake Cups. These little cups of joy combine the rich flavor of cheesecake with the iconic taste of Oreo cookies, making them the perfect indulgence for any occasion. Whether you’re hosting a party, enjoying a cozy night in, or just want to satisfy a sweet tooth, these cheesecake cups are a crowd-pleaser. Let’s dive into why you’ll love this simple yet delicious treat!
Why You’ll Love Oreo No-Bake Cheesecake Cups
There are countless reasons to get excited about these Oreo No-Bake Cheesecake Cups. First and foremost, they require no baking, which makes them a breeze to prepare. Plus, the combination of creamy cheesecake filling with crunchy Oreo crumbs creates a delightful textural contrast that’s simply irresistible. Not to mention, they’re perfect for portion control — no more fighting over the last slice of cheesecake!
But let’s be honest, it’s not just about the taste. These cups are incredibly versatile, allowing you to customize them according to your preferences. You can take your time to get as fancy or as simple as you like, from adding toppings to changing the base ingredients. Ready to make your own? Let’s gather our ingredients and get started!
Ingredients
To make your delectable Oreo No-Bake Cheesecake Cups, you’ll need the following ingredients:
- For the Crust:
- 24 Oreo cookies (finely crushed)
- 4 tablespoons unsalted butter (melted)
- For the Cheesecake Filling:
- 8 ounces cream cheese (softened)
- 1/2 cup powdered sugar
- 1 teaspoon vanilla extract
- 1 cup heavy whipping cream (cold)
- For Garnishment:
- Additional Oreo crumbs (for topping)
- Whipped cream (optional)
Step-by-Step Instructions
Let’s transform those simple ingredients into sweet, creamy perfection.
- Prepare the Crust:
- In a mixing bowl, combine the crushed Oreo cookies and melted butter. Stir until well combined.
- Spoon the mixture evenly into the bottom of your serving cups or jars, pressing down gently to create a firm base.
- Make the Cheesecake Filling:
- In another bowl, beat the softened cream cheese and powdered sugar together until smooth and creamy.
- Add the vanilla extract and mix until combined.
- In a separate bowl, whip the heavy cream until stiff peaks form (this should take around 2-3 minutes).
- Gently fold the whipped cream into the cream cheese mixture until fully incorporated. Be careful not to deflate the whipped cream; you want to keep that airy texture!
- Layer the Cups:
- Spoon or pipe the cheesecake filling generously over the crusts in each cup.
- Smooth the tops with a spatula if desired.
- Chill:
- Refrigerate the cups for at least 2-4 hours to let them set. If you’re in a hurry, aim for a minimum of 30 minutes — but longer chilling leads to a better texture!
- Serve and Enjoy:
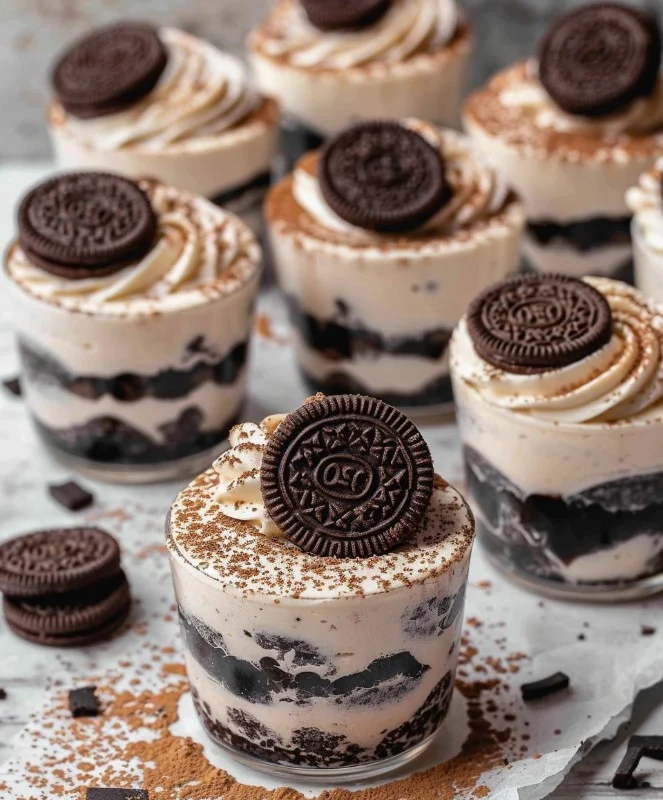
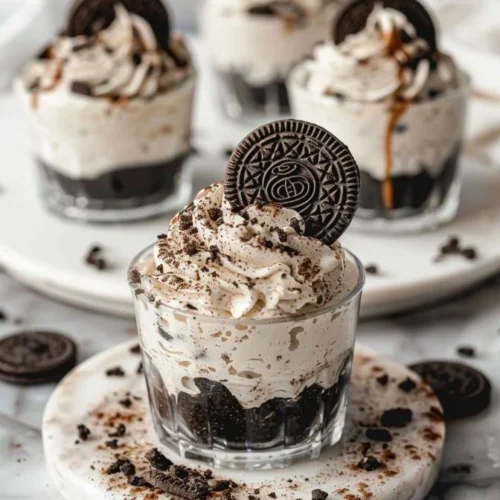
- Before serving, top with additional Oreo crumbs and a dollop of whipped cream for that extra touch.
Helpful Tips for Success
- Use Room Temperature Cream Cheese: Ensure your cream cheese is softened to room temperature for the best mixing results. This prevents lumps in your filling.
- Don’t Skip the Chilling Time: Letting the cheesecake cups chill is crucial for the filling to set properly. This will prevent the cups from falling apart when served.
- Personalize Your Ingredients: Feel free to add melted chocolate, caramel, or even a swirl of peanut butter for a unique twist.
Delicious Variations
While the classic Oreo No-Bake Cheesecake Cups are fantastic as-is, here are some creative variations you might enjoy:
- Mint Oreo Cups: Use Mint Oreos for a refreshing twist and add a sprinkle of mint leaves on top.
- Peanut Butter Oreo Cups: Swirl in some creamy peanut butter into the cheesecake filling for a rich, nutty flavor.
- Fruit Layer: Add a layer of fresh berries or fruit compote in between the crust and filling for a fruity freshness.
Perfect Serving Ideas
Oreo No-Bake Cheesecake Cups are versatile. They can be served in individual cups for ease or presented on a dessert platter for impressive gatherings. Pair them with fresh strawberries or serve them alongside a scoop of vanilla ice cream for an indulgent treat.
Storage Tips
These cheesecake cups can be stored in your refrigerator for up to 5 days. Just cover them with plastic wrap or a lid to keep them fresh. If making in advance for a party, prepare the crust and filling a day ahead, layering them just before serving.
Common Mistakes to Avoid
- Overmixing the Whipped Cream: This can cause it to become grainy, so gently fold it in to maintain that fluffy texture.
- Using Light Cream Cheese: Full-fat cream cheese gives the best flavor and texture, so try to avoid reduced-fat options for this recipe.
- Skipping the Chilling Step: Not allowing them to set can lead to messy cups that fall apart upon serving.
Health or Nutrition Information
While these Oreo No-Bake Cheesecake Cups are certainly a treat, it’s essential to enjoy them in moderation. Each cup is rich in calories due to the cream cheese and heavy cream, but they do provide a deliciously satisfying way to indulge your sweet tooth.
Nutritional Highlights (per cup):
- Calories: Approximately 250-300
- Total Fat: 18g
- Saturated Fat: 10g
- Sugar: 15g
Expert Insights
As a tip from those who have mastered the art of no-bake desserts: presentation is key. Use transparent cups or jars to showcase those delicious layers, and don’t hesitate to get creative with toppings!
FAQ Section
Q1: Can I make Oreo No-Bake Cheesecake Cups ahead of time?
Yes, these cups store well in the refrigerator for up to 5 days. Just assemble and chill without toppings, and add them just before serving for best results.
Q2: What is the main ingredient in Oreo No-Bake Cheesecake Cups?
The primary ingredients are crushed Oreos, cream cheese, powdered sugar, and heavy whipping cream. Each adds to the delectable taste and creamy texture.
Q3: Can I substitute the heavy cream?
You can use whipped topping as a lighter substitute, but the real whipped cream gives a homemade touch and better flavor.
Q4: Are there any gluten-free options available?
Yes! You can substitute gluten-free Oreo cookies to make this dessert gluten-free while still enjoying the deliciousness.
Q5: How do I prevent my cheesecake filling from collapsing?
Allow your cheesecake cups to chill properly before serving. The setting time helps firm up the filling so it holds its shape when you dig in.
Conclusion
Oreo No-Bake Cheesecake Cups are a fantastic, simple dessert that perfectly combines rich cheesecake flavors with the beloved taste of Oreo cookies. Their delightful texture, ease of preparation, and endless variations make them a must-have at any gathering. With just a few ingredients and minimal effort, you can create a show-stopping dessert that will have everyone asking for seconds. Enjoy making this sweet treat, and watch it become a favorite in both your household and among your guests!
Oreo No-Bake Cheesecake Cups
Ingredients
For the Crust
- 24 pieces Oreo cookies (finely crushed)
- 4 tablespoons unsalted butter (melted)
For the Cheesecake Filling
- 8 ounces cream cheese (softened) Use room temperature for best results.
- 1/2 cup powdered sugar
- 1 teaspoon vanilla extract
- 1 cup heavy whipping cream (cold)
For Garnishment
- Additional Oreo crumbs (for topping)
- Whipped cream (optional)
Instructions
Prepare the Crust
- In a mixing bowl, combine the crushed Oreo cookies and melted butter. Stir until well combined.
- Spoon the mixture evenly into the bottom of your serving cups or jars, pressing down gently to create a firm base.
Make the Cheesecake Filling
- In another bowl, beat the softened cream cheese and powdered sugar together until smooth and creamy.
- Add the vanilla extract and mix until combined.
- In a separate bowl, whip the heavy cream until stiff peaks form (this should take around 2-3 minutes).
- Gently fold the whipped cream into the cream cheese mixture until fully incorporated. Be careful not to deflate the whipped cream.
Layer the Cups
- Spoon or pipe the cheesecake filling generously over the crusts in each cup.
- Smooth the tops with a spatula if desired.
Chill
- Refrigerate the cups for at least 2-4 hours to let them set. If you're in a hurry, aim for a minimum of 30 minutes.
Serve and Enjoy
- Before serving, top with additional Oreo crumbs and a dollop of whipped cream for that extra touch.